DIY oil change – How to change oil in my car?
Oil change equipment and supplies
Before you pop the hood, make sure you have the right tools for the job. What you will need may vary between vehicles, but some of the most common oil change equipment and supplies are listed here:
- Motor oil + oil filter
- Wheel ramps + chocks
- Safety glasses + gloves
- Ratchet + socket set
- Oil filter wrench + torque wrench
- Funnel + oil pan
- Clean rags + newspaper
Finding the right oil and filter
Use our product selector to help you find out which oil and filter to use. You should also check your vehicle’s owner’s manual for oil grade (e.g., 0W-20), oil capacity (e.g., 5 quarts), type of oil filter, warranty information and how often to change your oil.
1. Wear safety equipment
Safety must be a priority when performing any type of vehicle maintenance. Always use protective gear to help prevent injuries. Always exercise caution when using hand tools.
Note: All oil change instructions on this page are intended to be used as general guidelines. Refer to your vehicle’s owner’s manual for manufacturer-specific oil change instructions.
2. Drive onto ramps
With your vehicle parked on a dry, level surface, center the ramps directly in front of the front wheels. Slowly drive your vehicle forward onto the ramps, put the vehicle in park and engage the emergency brake. Check to see if the ramps shifted out of position; the front wheels must be centered on top of the ramps before you continue.
Center one chock directly behind each one of your vehicle’s rear wheels. Make sure both chocks have a snug fit against the rear wheels.
3. Locate and remove drain plug
Place the oil pan directly under the drain plug. Place newspaper around the oil pan. Attach the appropriate socket to the ratchet. Fit the socket on the drain plug. Carefully loosen the drain plug with the ratchet, slowly turning counterclockwise. Once the drain plug is loosened, complete its removal by hand. You may also have to remove a drain plug gasket.
Note: The used oil and some metal surfaces may be extremely hot. Some vehicles have a metal or plastic plate covering the underbody, which may need to be removed to access the drain plug. Refer to your vehicle’s owner’s manual for the specific socket size you need.
4. Reinstall drain plug
After allowing the oil to drain for several minutes, reinstall the drain plug with the torque wrench, slowly turning clockwise. You may also have to reinstall a drain plug gasket. Refer to your vehicle’s owner’s manual to apply the manufacturer-specified torque.
Note: Oil pan threads, drain plug threads and drain plug gaskets can wear down over time. Visual inspection of these parts is important during each oil change. If any parts appear to be damaged, follow your vehicle’s owner’s manual for part replacement recommendations.
5. Locate and remove oil filter
Reposition the oil pan and newspaper directly under the oil filter. Fit the oil filter wrench on the oil filter. Carefully loosen the oil filter with the oil filter wrench, slowly turning counterclockwise. Once the oil filter is loosened, allow oil to drain for a few seconds before completing its removal by hand.
Note: Some vehicles have a metal or plastic plate covering the underbody, which may need to be removed to access the oil filter. Cartridge-style oil filters (i.e., oil filters with reusable housing) and spin-on-style oil filters (i.e., disposable oil filters) require different types of oil filter wrenches for removal. Make sure the O-ring gasket has been removed with the oil filter; the O-ring gasket can remain stuck to the engine plate, especially with spin-on style oil filters.
6. Install new oil filter
For cartridge-style oil filter – Place the new paper filter into the cartridge housing, apply a thin layer of oil to the new O-ring gasket and fit the new O-ring gasket into the groove of the cartridge housing. Install the new oil filter by fitting the oil filter wrench on the new oil filter, slowly turning clockwise to tighten.
For spin-on-style oil filter – Apply a thin layer of oil to the new filter’s O-ring gasket. Install the new filter by hand, slowly turning clockwise to tighten.
7. Pour new oil
Open the hood of your vehicle, remove the engine oil cap by turning counterclockwise and place the funnel into the fill hole. Slowly pour the manufacturer-specified amount of Mobil 1™ motor oil into the funnel. Apply a thin layer of oil to the threading of your engine oil cap and reinstall by turning clockwise.
8. Drive off ramps
Remove the chocks and disengage the emergency brake. Place your vehicle in reverse and slowly drive it backward off the ramps. With your vehicle on a dry, level surface again, place your vehicle in park.
9. Check for oil leaks
Start the engine and allow your vehicle to idle for 2 minutes. During this time, visually inspect your vehicle for leaks around the drain plug and oil filter. If you see any leaks, immediately shut off the engine and investigate further; your vehicle may require replacement parts and/or professional repairs.
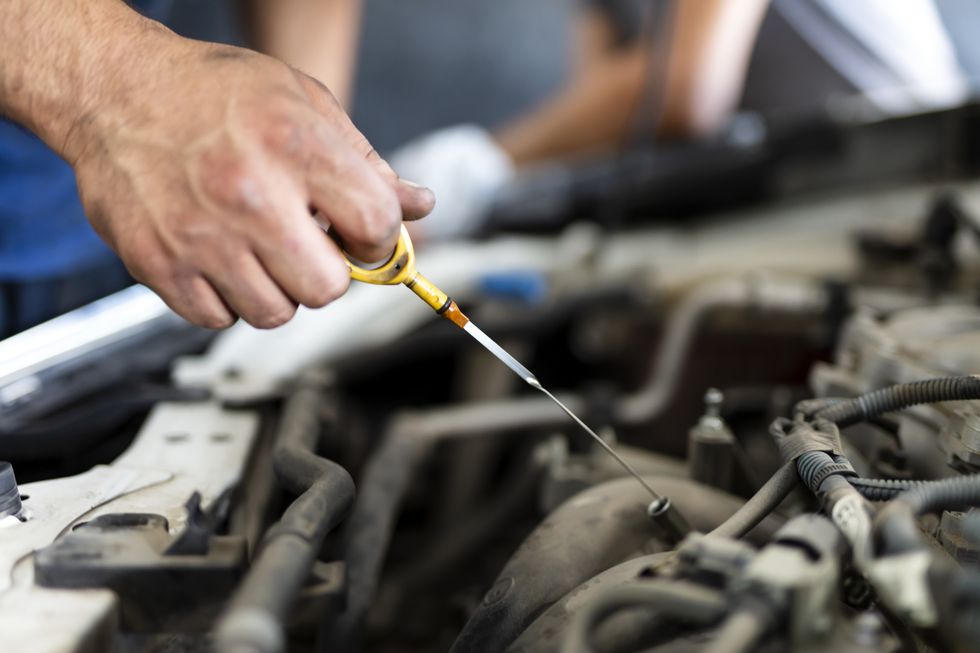
10. Check oil level
Shut off the engine and allow the new Mobil 1 motor oil to settle for 2 minutes. Remove the dipstick and wipe it with a clean rag or paper towel. Insert the dipstick, wait for a second and remove it again. Review the oil level in relationship to the dipstick’s indicators; small markings on the dipstick will let you know where the oil level should be.
11. Log info, clean up, recycle used oil
Write down your vehicle’s current mileage and the date. Refer to your vehicle’s owner’s manual for the recommended oil change interval (i.e., miles driven between oil changes), add that number to your vehicle’s current mileage (e.g., 45,000+7,500=52,500) and change the oil again at the resulting mileage. Carefully dispose of the used oil filter, any used rags, newspaper or paper towels. Put away your tools.
Recycle the used motor oil. Many service stations and quick lubes will accept used motor oil and used oil filters at no charge.
Ready for your next oil change?
The miles can really add up quickly between oil changes. Refer to your vehicle’s owner’s manual for manufacturer-specific oil change instructions, warranty information and more.